
My kids love holidays. Every holiday. We started celebrating Valentine’s Day back at the beginning of January. Christmas of course is our favorite, along with Easter.
Now that Valentine’s Day is over though, my kids haven’t been able to stop talking about wearing green and getting pinched.
A few years ago, we started the tradition of making a leprechaun trap. That darn leprechaun keeps escaping though!
This year my oldest is determined to catch him by making a trap out of bricks. I wonder how he is going to escape that one.
Anyways, I went to bed the other night and an idea of a St.Patrick’s Day cake popped into my head, and I just had to make it.
My kids are in LOVE with this cake, and it might very well become a new tradition in our house each year.
My son proclaimed, ” I don’t like this cake mom, I love it!”
So, I wanted to spread a little joy and came up with this tutorial for you guys. I promise your kids will love the cake and you so much.
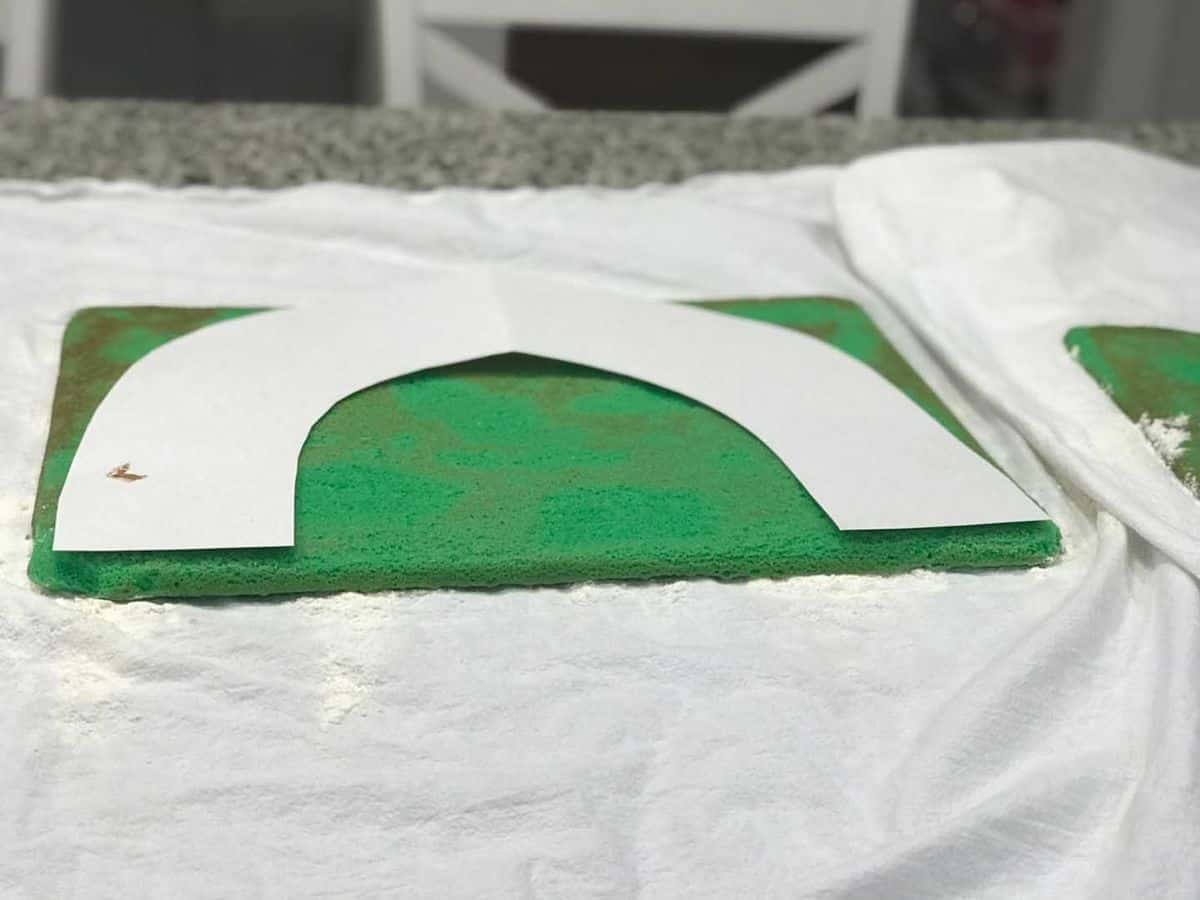
First off, bake two cakes using sheet pans. Be sure to dye the batter green beforehand. Once the cakes are baked, flip them onto two towels sprinkled with powdered sugar to prevent them from sticking.
Use a piece of poster board to create a rainbow shape and place it on top of one of the sheet cakes once it has cooled. Use a serrated knife to cut along your template. Repeat on your second sheet cake.
Ta-Da! You have two rainbow shapes now.
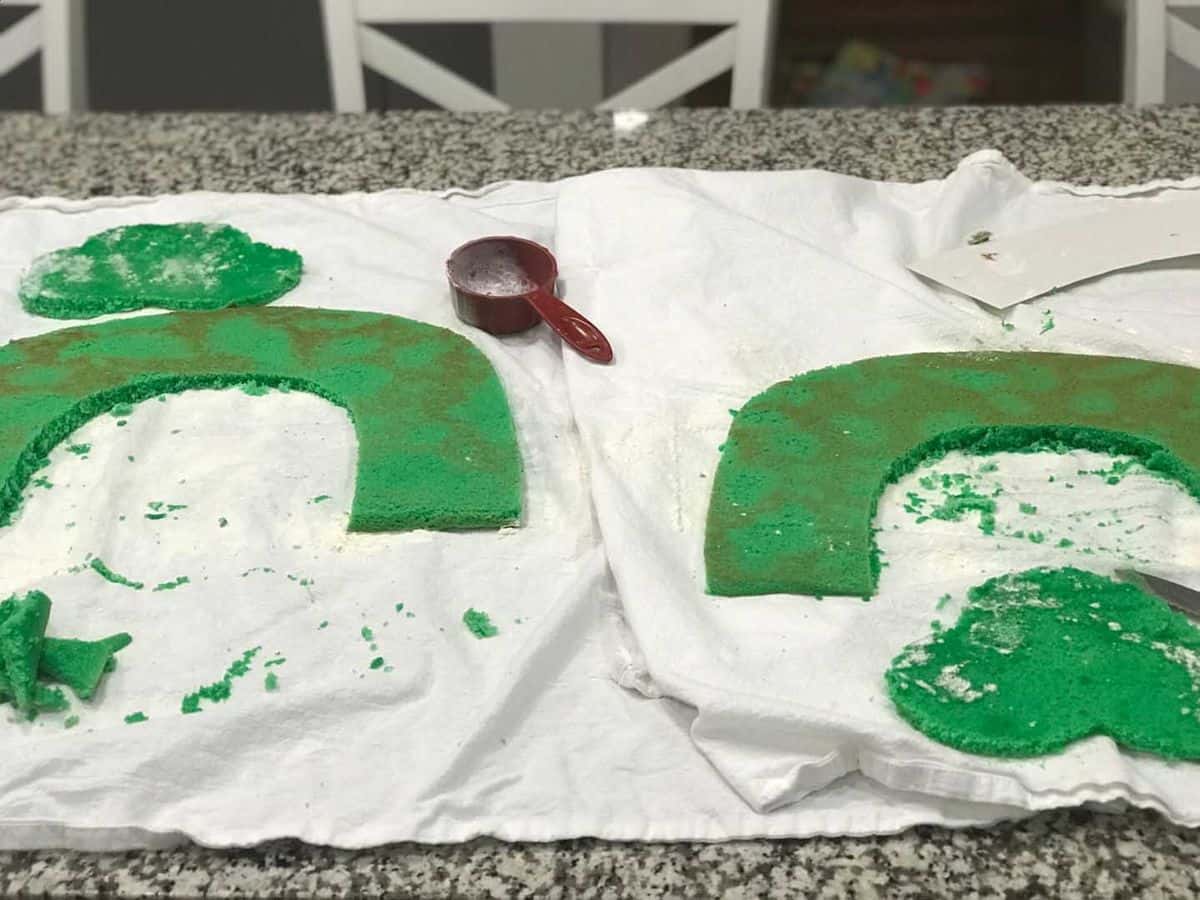
Create a cloud shape template with poster board and use the extra cake that you cut out from underneath the rainbow to make the cloud shape. Repeat on your second sheet cake.

Here’s where it gets a little tricky. Cut out the bottom left part of the rainbow so that the rounded top of the cloud fits nice and snug in there. Make sure to do that on both of your rainbow pieces. It gets tricky if you don’t. Trust me, I learned the hard way.

Next, make a lot of frosting. I wanted to use something light and fluffy, so I used my favorite Swiss Meringue Frosting. You can find the recipe here. If you are not a fan of eggs in your frosting, or have another favorite you would like to use, just make sure to have about 8 cups. You will use it all.
In a decorating bag fitted with a 1A cake tip, fill your bag with frosting and outline your bottom layer rainbow and cloud. Stack the top layer and press lightly just so it will stick to the frosting. Don’t push too hard, or your frosting will squirt out.
Once your top layer is on, outline the shapes again with frosting, and then fill in the remaining space.
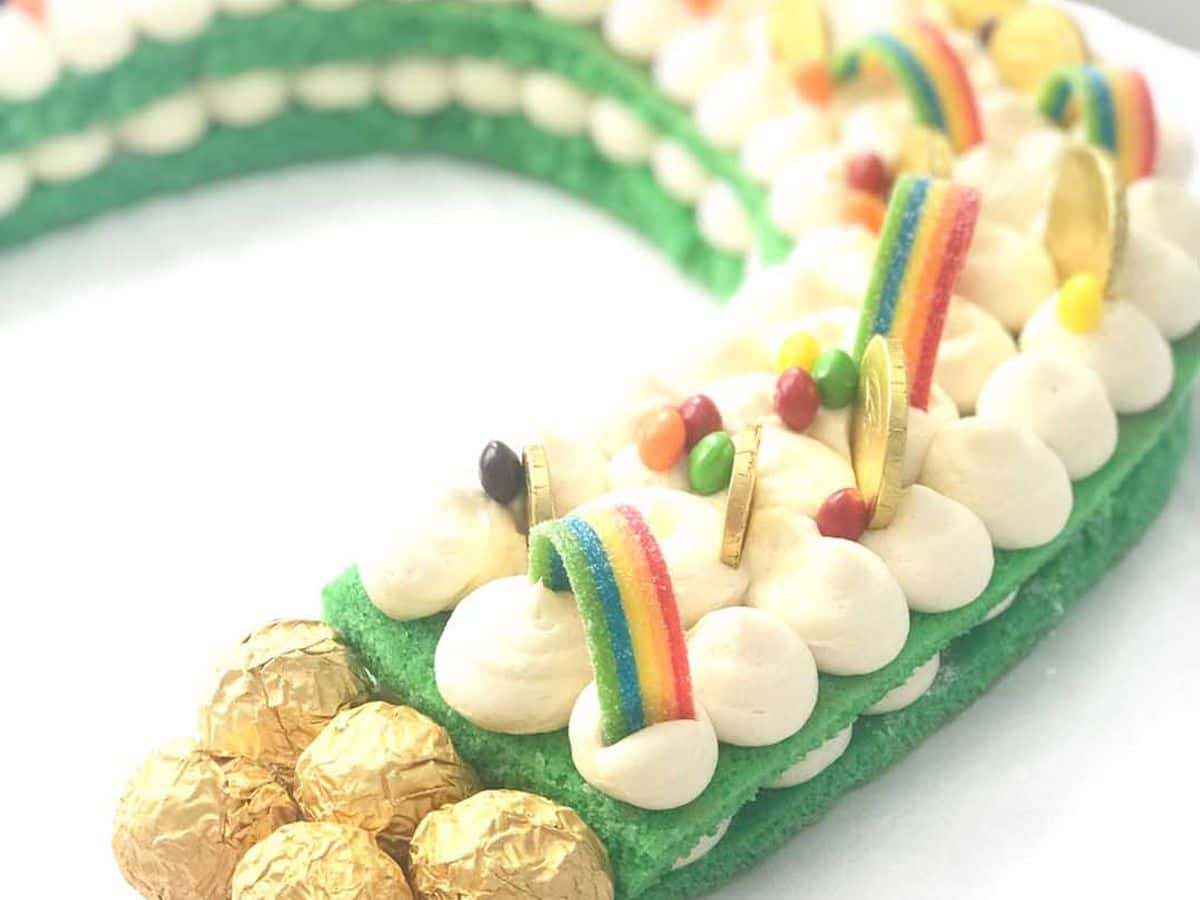
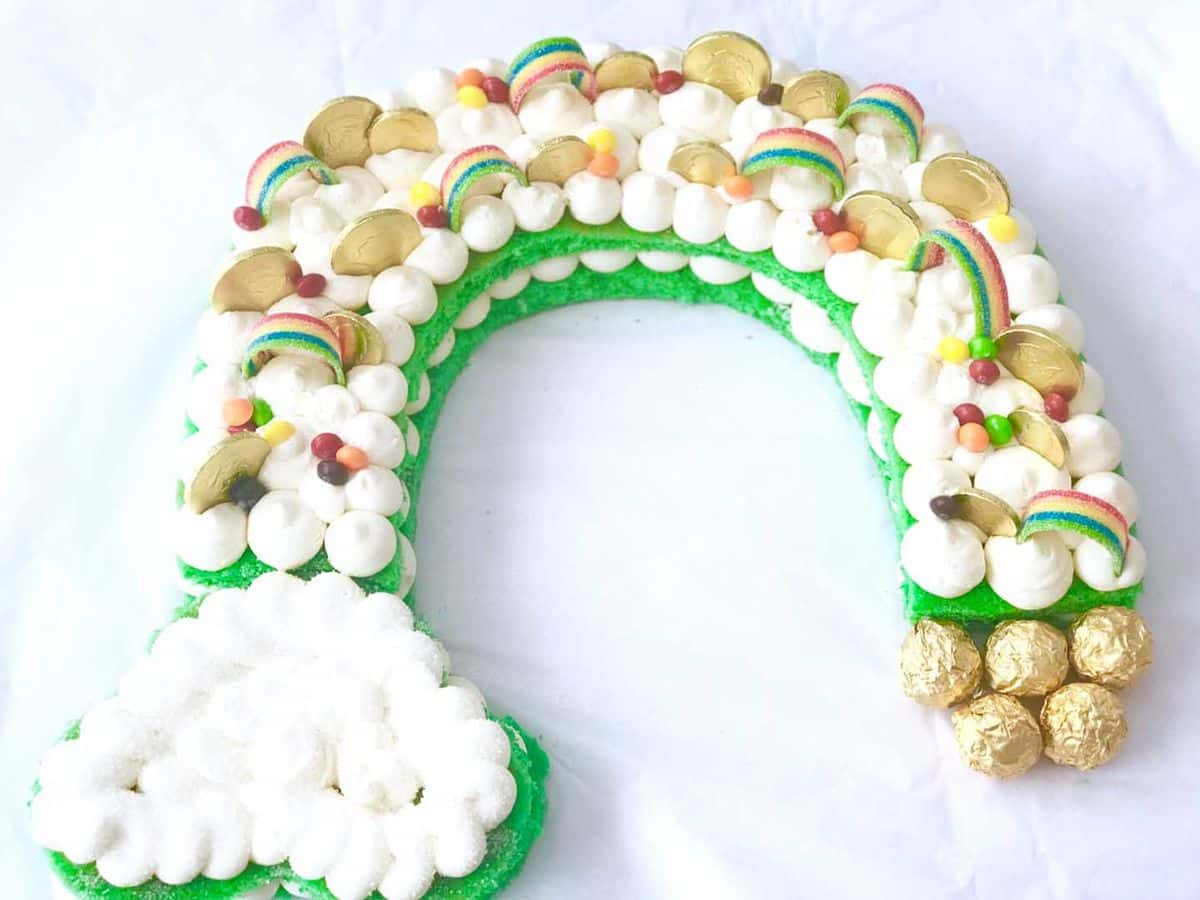
Now comes my favorite part – the decorating! I used Skittles, Chocolate Coins, Airheads Xtremes, and Ferrero Rocher Chocolates as my gold at the end of the rainbow.
I sprinkled the cloud portion with white sugar crystals. By sprinkled, I mean I completely covered it so it would sparkle!
Then I started with the gold coins and slowly filled it in with rainbow pieces. You will want to cut those somewhat smaller so they will hold the shape of a rainbow. Then I placed a few skittles here and there and viola – you’ve got yourself a St. Patrick’s Day cake!
Comments